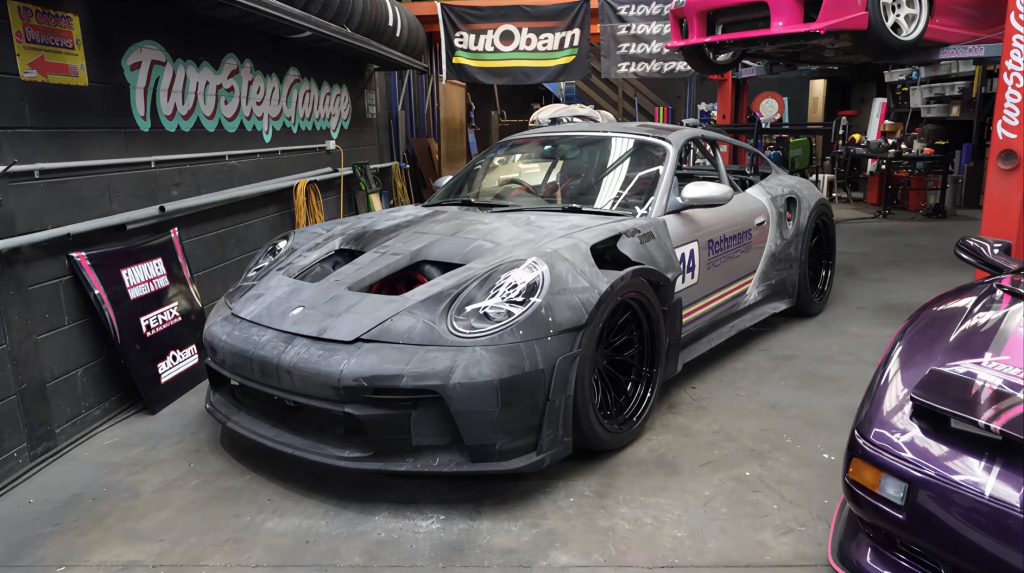
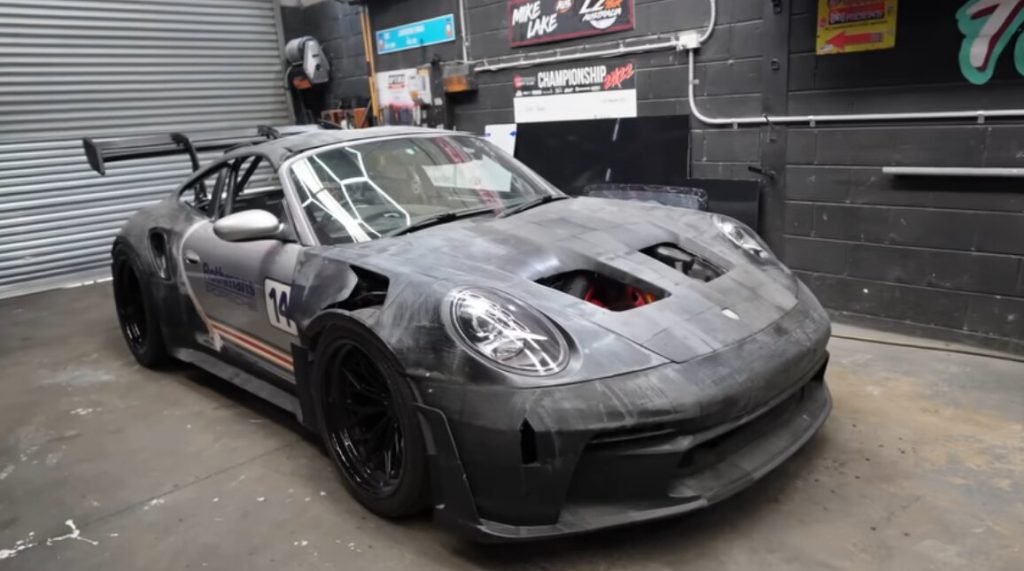
Mike Lake, an automotive YouTuber, is building something unusual. He is creating full-size body panels inspired by the Porsche 992 GT3 RS, but instead of using metal or carbon fiber, he is using desktop 3D printers.
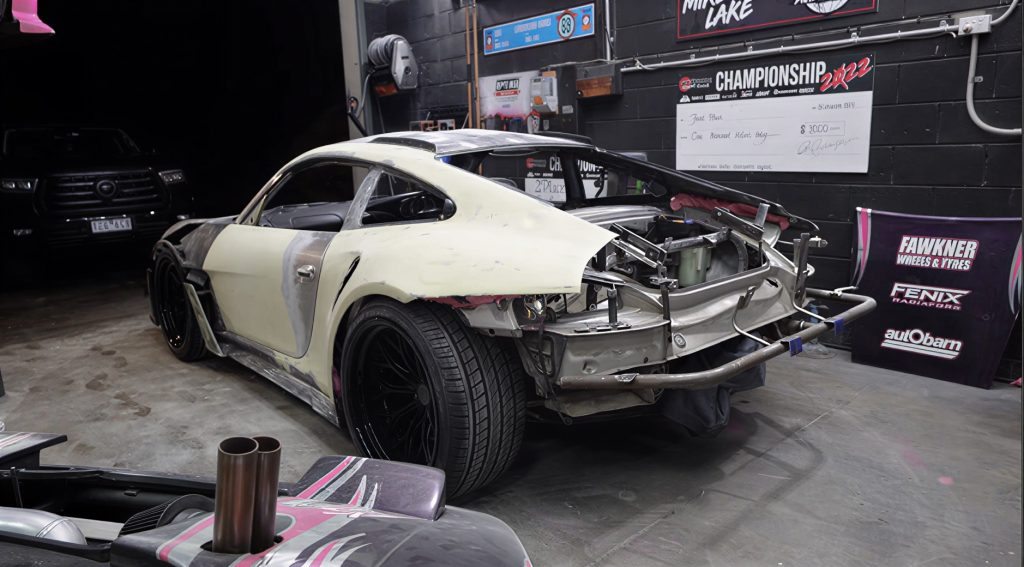
This is not a full car build. The base of the project is a Porsche Boxster 986. The original chassis, engine, suspension, and safety systems stay the same. Only the exterior body panels are replaced with 3D printed parts.
Cheap printers, big results
The project uses multiple Elegoo Neptune 4 Pro 3D printers. These are consumer machines that cost about US$400 each. They are not industrial machines, but they run for many hours without stopping.
All parts are printed using PETG filament. This material is chosen because it can handle heat, sunlight, and is easier to print than other plastics.
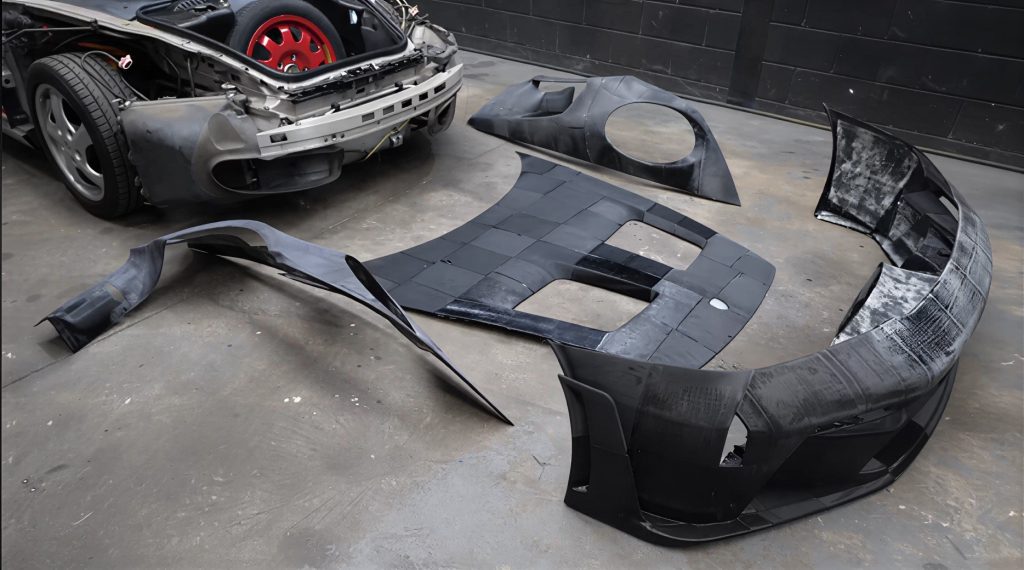
Because the printers are small, every panel must be divided into many smaller pieces. For example, one front fender is made from 21 separate parts. It takes around 55 hours to print and uses about 1.9 kg of material. The cost of filament for that part is about $30.
Problems during printing
At the beginning, there were many issues. Cold temperatures in the workshop caused warping and bad adhesion. Some prints failed or collapsed during long sessions.
These problems were reduced by adjusting the printer settings. The print bed was leveled carefully, temperatures were increased, and the printers were enclosed to keep heat stable.
The printing method also changed. Early parts were solid, which used too much material and time. Later, parts were printed with thin walls (1.2 to 2 mm) and 20% infill. This made them lighter and faster to produce.
Assembly and reinforcement
After printing, all parts are joined together by melting the plastic edges with a soldering iron. Glue is also used inside the seams.
Once a full panel is assembled, fiberglass is added to the back. This makes the panel strong enough to handle sanding and fitting. Without fiberglass, the parts would be too weak.
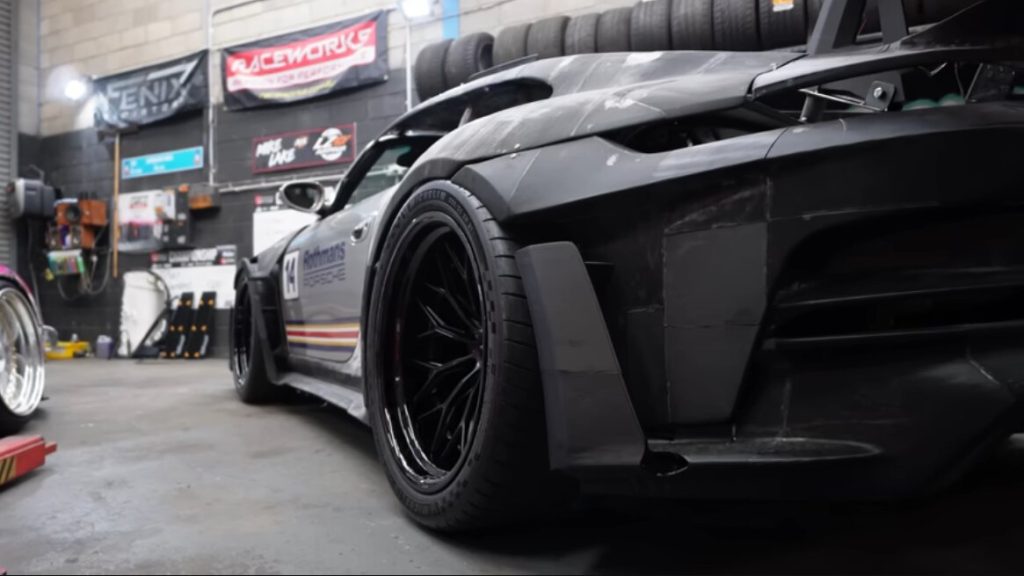
The surface is then sanded to remove print lines and imperfections. PETG allows controlled sanding, so the final shape becomes smooth and accurate.
Fitting on the car
The printed panels are mounted on the Boxster using temporary methods first. Clamps, tape, and simple fasteners help to test alignment and panel gaps.
For the bonnet, the original inner structure of the Boxster is kept. The printed outer surface is attached on top. This keeps the original hinges and locking system.
Rear panels are the most complex. Each side uses 56 printed pieces. These parts must be cut and adjusted to fit correctly. Even though the material is plastic, it is strong and takes time to shape.
Time and material scale
This project is very large. The front section alone needed around 681 hours of printing and 19 kg of material. Failed prints added another 100 hours and 5 kg of waste.
The bonnet took about 140 hours, while the front bumper needed more than 380 hours to complete.
After fiberglass reinforcement, the weight of the printed panels is close to real factory parts. One fender reaches about 3.5 kg, similar to the original GT3 RS.
What this project shows
This build proves that large car panels can be made with low-cost 3D printers. It also shows the limits. The process takes a lot of time, requires manual work, and needs extra reinforcement.
The project is still not finished. Rear panels, roof, and final mounting are still in progress. But even now, it shows how far home 3D printing can go in the automotive world.